Technical Specifications
1 - Lower molding application and measurement ranges
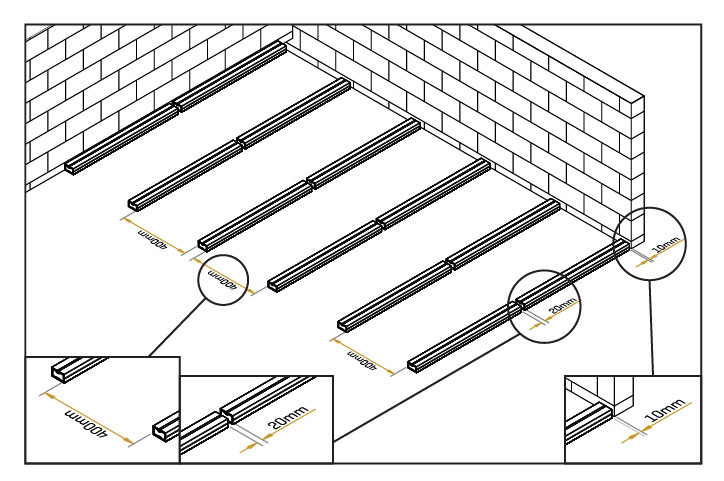
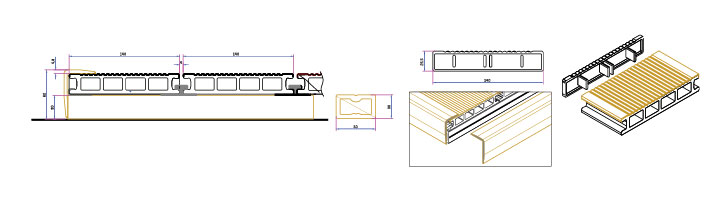
30×50 mm lower moldings must be fastened with screws that are compatible to the floor. The distance between the screws must be 50 cm maximum.
To prevent the water from accumulating on the decking surface, the lower moldings must be installed with an inclination of 4 degrees in the beginning.
Lower moldings must be installed with a maximum 40 cm of distance between each molding.
To facilitate the water discharge, the tips of the joints for the lower moldings must be installed with 2 cm of gaps between them.
Lower moldings must be installed with a 1 cm of space left on the ends of each wall.
2 – Decking baseboard or empty edge starting pattern:
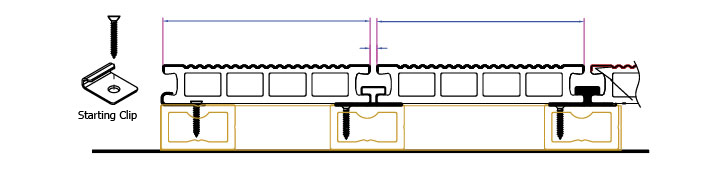
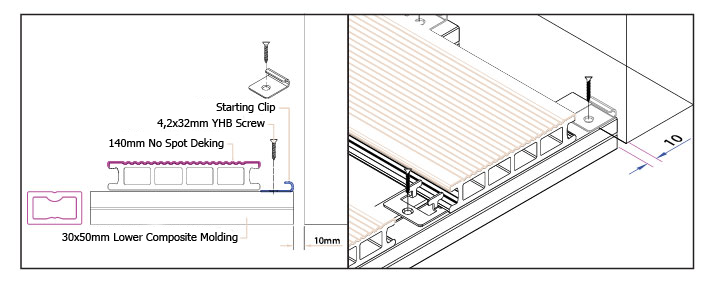
After the lower moldings are assembled, Decking must be screwed down with a starting clip and 3,9×32 YHB screws. See the adjacent figure.
After the starting clips are installed, the decking side lugs are mounted on the clip channels.
3 Assembly of metal or plastic interconnecting components:
.png)
Metal flange or plastic T connector pieces as decking connectors are connected to the lower floor moldings with the help of screws. Nails are not to be used under any condition and the Decking is not to be screwed in.
4 Dimensions to be left on the lower molding or the top decking during decking surface to surface assembly..
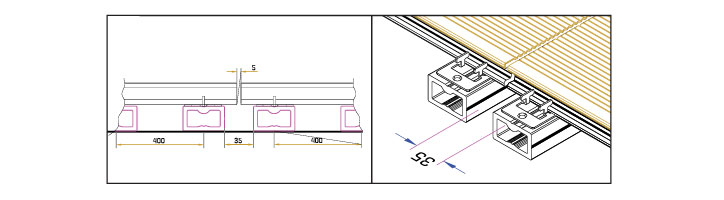
3,5 cm of distance must be left between the lower molding decking joint connection points and they must be fastened to the floor, and a 5 mm intermediary gap must absolutely be left for two decking joint connections.
5 – Side 60×40 mm composite enclosure and decking front cap application
After the decking installation works are finished, the open ends of the decking can either be closed with a cap profile or a composite 60x40 mm profile or an aluminum F profile.